Blending with
Layers and Gradients, Custom Brushes
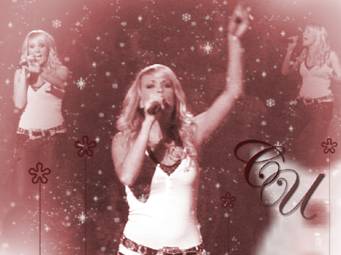
1 OPEN: carrie1.jpg, carrie2.jpg, carrie3.jpg and hands1.jpg
1.
First , make it so you can see all the pictures.
Click Window> Tile Vertically. NOTE: You can zoom all windows at the same
time by clicking the check box at the top of the page. ![]()

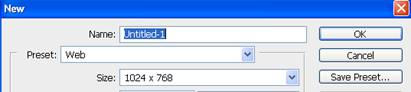
2.
Now, we’re going to create a wallpaper for the
computer. Click File> New and choose the Web preset (1024x768) as shown
below:
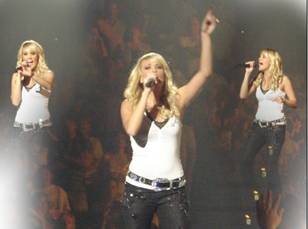
3.
Select parts of the Carrie pictures using the
oval marquee tool with a feather set to 75 px. Using the move tool, drag them
over to the wallpaper in this fashion, dragging the biggest picture in as the
lowest layer: 
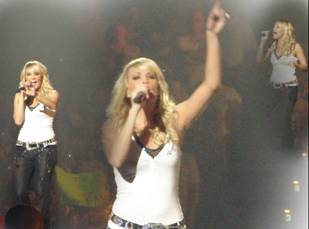
NOTE: Zoom out to about 50% so you can see the move handles and resize holding
Shift.
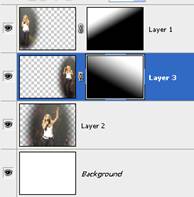
4.
Add a mask to each of the upper layers and use
the gradient tool to create a black to white gradient to better blend the
photographs.
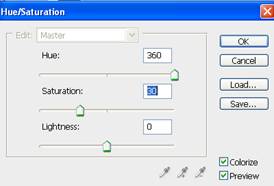
5.
 Next,
click on the top layer. Add an adjustment layer
Next,
click on the top layer. Add an adjustment layer
![]() (Hue/Saturation) set as follows (check
Colorize!):
(Hue/Saturation) set as follows (check
Colorize!):

6.
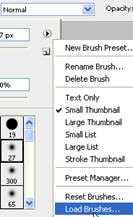 Now, how about some embellishment? You
can add custom brushes in Photoshop, so let’s load the custom brush included in
the Brushes folder called SSGlitter.
Now, how about some embellishment? You
can add custom brushes in Photoshop, so let’s load the custom brush included in
the Brushes folder called SSGlitter.
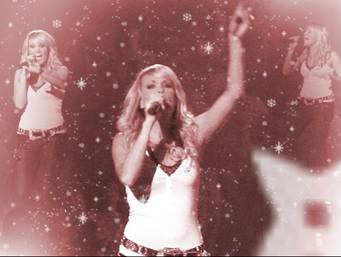
7. Create a new layer on top. Now, using brush 31, set the size to about 600 and “stamp” (click once) in the bottom right corner, hanging partially off (set color to white).
8.
Keeping the brush white, choose brush 200
(pretty stars!), enlarge to about 400 and click in various places to add stars.
Then, use the eraser and erase stars from important places like faces and
bodies. J
9.
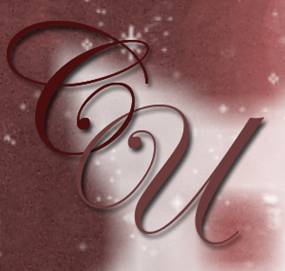
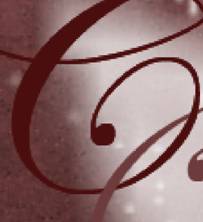 Now, to add some text. Create a text layer
with a capital C and another with a capital U. Use Edwardian Script font, size
150. Make each a different shade of the colors used in the project. Overlap the swirls (we are going to make it
look like they are intertwined).
Now, to add some text. Create a text layer
with a capital C and another with a capital U. Use Edwardian Script font, size
150. Make each a different shade of the colors used in the project. Overlap the swirls (we are going to make it
look like they are intertwined).
10. Duplicate the C layer so that you have the “new” C layer on top, then the U layer next, and below it, the “old” C layer. Then, on the top C layer, rasterize the layer (right click it) and erase the lower overlap area.
11.
 Add
a drop shadow layer style to the bottom two text layers.
Add
a drop shadow layer style to the bottom two text layers. ![]()
12.
Create a new layer on top named stalks. Pick the
paintbrush and load the brush set called Stalks. Using one of your darker
colors, stamp some floral stalks on the project (555, 589, 558, 594 are all
good ones).
NOTE: These start pretty big, so you may need to resize them.
13.
 Lower the opacity of the Stalks layer to
around 75% or whatever looks good to you.
Lower the opacity of the Stalks layer to
around 75% or whatever looks good to you.
14.
 All done!