Healing and
Cloning: Just what the doctor
ordered. Magically removing items/objects/blemishes from photos.
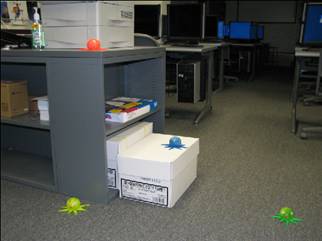
Before…invasion
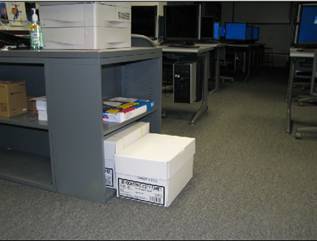
of the octopi After…octopi
no more!
@
TASK: Removal #1—Clone Stamp Tool
 1 OPEN: octo.jpg
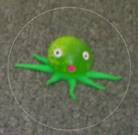
1. First, let’s remove Mr. Green. Zoom into him, roughly 120%.
2.
Select the clone stamp tool ![]() from the toolbox. Enlarge your brush size
(press the
from the toolbox. Enlarge your brush size
(press the ![]() button
repeatedly) to around 500 px. It should
be big enough to completely encircle Mr. Green.
button
repeatedly) to around 500 px. It should
be big enough to completely encircle Mr. Green.
3.
![]()
 Now,
point to an area of carpet above Mr. Green that does not include Mr. Green.
Hold
Now,
point to an area of carpet above Mr. Green that does not include Mr. Green.
Hold ![]() (you’ll
get a target sign) and click. This defines the source of the area of “good” we
want to use to get rid of Mr. Green.
(you’ll
get a target sign) and click. This defines the source of the area of “good” we
want to use to get rid of Mr. Green.
4. Now, point to him and click over and over until he is just a memory.
5. All good. He’s gone!
@
TASK: Removal #2—Spot Healing Brush
1. Now, we will remove Mr. Orange’s eyeball. Zoom on him and select the Spot Healing brush tool. Enlarge a round brush until it is big enough to cover the eyeball.
2.
 Click to heal the spot (may have to click a couple of
times to click and make it smaller and then click again over the smaller area.
That’s it!
Click to heal the spot (may have to click a couple of
times to click and make it smaller and then click again over the smaller area.
That’s it!
 @ TASK: Removal
#3—Patch Tool
@ TASK: Removal
#3—Patch Tool
3.
Now, we will remove Mr. Yellow. Zoom on him and
select the Patch tool ![]() .
.
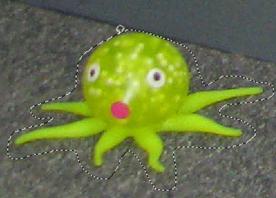
4. Using the Patch tool, draw a rough outline around the subject (lasso style).
5. Point to the middle of the selection and drag over to a “good” area of carpet.
6.
Wow, look! He’s gone and carpet remains. 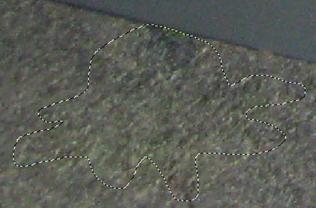
7. If necessary, touch up with the clone stamp tool.
8.
Press ![]() +D to deselect
the area. NOTE: If you have a selection and try to do anything (paint, erase,
touch up, etc.) it will only allow you to do that within the selection area.
+D to deselect
the area. NOTE: If you have a selection and try to do anything (paint, erase,
touch up, etc.) it will only allow you to do that within the selection area.
@
TASK: Removal #4—Clone Stamp Tool (restricted)
9. Now, we will remove Mr. Blue from the box. Zoom on him.
10.
This one is a little bit tricky because there
are edges to deal with on the box. The best approach is probably to use the
clone stamp tool combined with the polygonal lasso tool. Click the clone stamp
tool ![]() ,
press
,
press ![]() on
a good area of blank white on the box top and click to define a source point,
then click and drag on the octopus to remove as much as you can. Don’t get too
close to the edges.
on
a good area of blank white on the box top and click to define a source point,
then click and drag on the octopus to remove as much as you can. Don’t get too
close to the edges.
11.
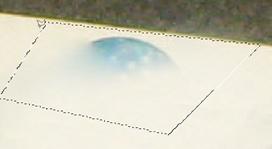 Next,
switch to the polygonal lasso tool
Next,
switch to the polygonal lasso tool![]() . Click, let go, click at a corner, let go,
repeat until you close the lasso (think dot-to-dogs). Double click if needed to
complete the selection.
. Click, let go, click at a corner, let go,
repeat until you close the lasso (think dot-to-dogs). Double click if needed to
complete the selection.
12.
Switch back to the clone stamp tool and redefine
the source (![]() +click).
Now, if you click and drag to clone out the areas you missed before, it will
not reach beyond the boundaries of the selection. No worries about messing up
the edges!
+click).
Now, if you click and drag to clone out the areas you missed before, it will
not reach beyond the boundaries of the selection. No worries about messing up
the edges!
13.
Press ![]() +D to
deselect the area. Repeat this process on any other area near an edge.
+D to
deselect the area. Repeat this process on any other area near an edge.
14. < SAVE AS: OctoEdited.psd
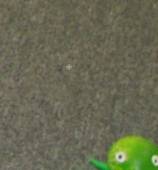
15. + ON YOUR OWN: Remove the final octopus (it’s pretty hard!) or try fixing the glare on the marble column on the fblaiscool.jpg photograph. For practice using the polygonal lasso for touchup, try removing the clear strap on hmm.jpg.