Text: Some quick text effects
1 OPEN: brick.jpg
1. Using the Text tool, click and draw to drag a box.
2. Set font to 150 pt, select a color, and type.
3. Switch to the move tool to position the text.
4. Click Edit> Transform> Skew and drag corners so the text box tilts upward in the outlined brick area. Double click to accept.
5. Right click the text layer and Rasterize text.
6. Click Edit> Transform> Perspective and drag left side to refine the perspective of the tilt. Double click to accept.
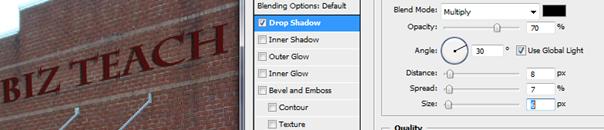
7.
Add a Drop Shadow layer style—Layer> Layer
Style> Drop Shadow with settings as follows:
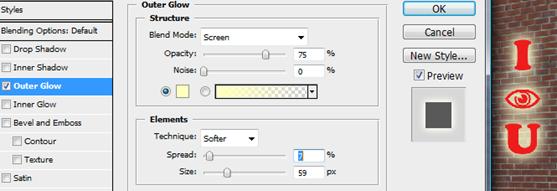
8. Now, to graffiti the brick. Draw a text box and pick a really fat, chunky font.
9.
Add an Outer Glow layer style to give it that
spray paint effect.
10.
 Now, to age this text, we need to use an
eraser and erase parts irregularly. One problem, though. If you have a layer
style and you erase something, it will not affect the style. So, if I erased my
red lettering, the yellow would still show through. NOT GOOD. The solution?
Separate the text from the effect. Right click the word Effect on the layer and
select Create Layer. They will separate!
Now, to age this text, we need to use an
eraser and erase parts irregularly. One problem, though. If you have a layer
style and you erase something, it will not affect the style. So, if I erased my
red lettering, the yellow would still show through. NOT GOOD. The solution?
Separate the text from the effect. Right click the word Effect on the layer and
select Create Layer. They will separate!

11.
Now, ![]() +Click
to select both of those layers, right click, and Merge Layers. Now, they will
become one rasterized layer with no attached effects.
+Click
to select both of those layers, right click, and Merge Layers. Now, they will
become one rasterized layer with no attached effects.
12.
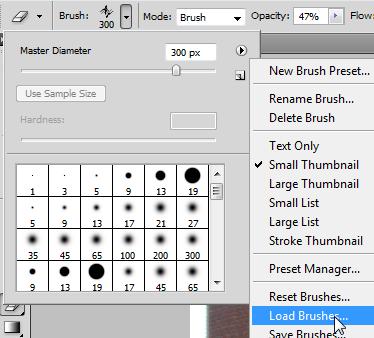
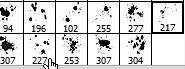
Now, erase some of the text to age it. You can
load custom brushes (.abr files) of cracks, spatters, grunge, etc. To do that,
select the eraser tool and at the options bar at the top, click the little
flyout menu arrow and select Load Brushes. You will find some brushes in the
Brushes folder provided. Select Spazzsplatter. They will appear at the bottom
of your brushes list. Just pick one and use it to erase a little bit.
13.


 Once
you’ve touched it up, change the layer blending mode from Normal to Overlay and
lower the Opacity a little bit. This should make the letters a little more
transparent so you can see the bricks through them.
Once
you’ve touched it up, change the layer blending mode from Normal to Overlay and
lower the Opacity a little bit. This should make the letters a little more
transparent so you can see the bricks through them. 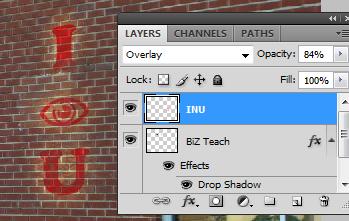
14. If you desire, use Transform controls (Edit> Transform) to change the shape (try Warp…pretty cool).
15. < SAVE AS: BrickEdited.psd