Photoshop Bag O’ Tricks
Want to take that Recolor Skin
 1 OPEN: witch.jpg and
pumpkin.jpg
1 OPEN: witch.jpg and
pumpkin.jpg
1.
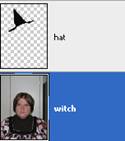

First, let’s get the witch hat for my head. On pumpkin.jpg, use the ![]() magnetic lasso to select the hat (set feather
to 0 and width to 10—press backspace while drawing if you mess up; hold Shift
if you need to move to a different part of the image without ruining the
selection). Click Refine Edge and preview the selection (tweak if needed). Press
OK. Then, drag the hat over to the witch.jpg photograph using the
magnetic lasso to select the hat (set feather
to 0 and width to 10—press backspace while drawing if you mess up; hold Shift
if you need to move to a different part of the image without ruining the
selection). Click Refine Edge and preview the selection (tweak if needed). Press
OK. Then, drag the hat over to the witch.jpg photograph using the ![]() Move tool (remember, if you try to move while
still on the lasso tool, you’ll move the marching ants and not the actual
picture).
Move tool (remember, if you try to move while
still on the lasso tool, you’ll move the marching ants and not the actual
picture).
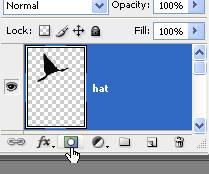
2.
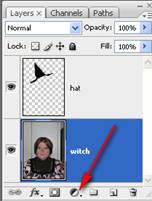 Rename
the layers—hat and witch. Just double click the layer name, type it in, and
press enter.
Rename
the layers—hat and witch. Just double click the layer name, type it in, and
press enter.
3.
Click on the witch layer. Use the magnetic lasso![]() to select the face.
to select the face.
4.
Now, we’re going
to add an adjustment layer to make the face green. Click the icon at the bottom
of the layers palette and click Hue/Saturation.
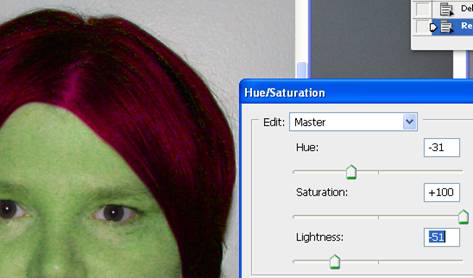
5.
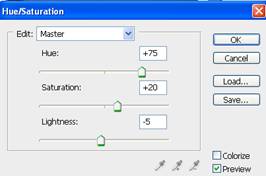
Apply the following settings: (NOTE: If you need to modify the settings, no
biggee…just double click the icon on the adjustment layer and this dialog box
will come back up)
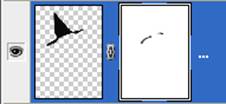
6.
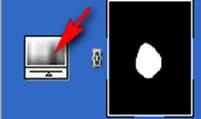
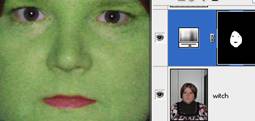 This
created a layer mask (notice the white face blob). If you need to refine the
mask, just click it and use a white or black brush as needed to show/hide
areas).
This
created a layer mask (notice the white face blob). If you need to refine the
mask, just click it and use a white or black brush as needed to show/hide
areas).
7. Now, we want the color back in the eyes and the lips. Be sure you are on the adjustment layer mask thumbnail and use a black brush to hide these areas.
8.
Now, turn the visibility off the hat layer so
you can see the hair. Then, click the witch layer and use the magnetic lasso ![]() to
select the hair.
to
select the hair.
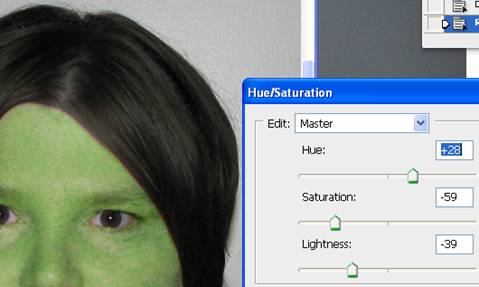
9.
Add an adjustment layer for the
hair—Hue/Saturation (notice since it was selected, it pre-masked for you). You
can recolor the hair. Variations:
10.
 Now,
you must touch up the layer so you don’t have any “face” peeking out. Again, be
on the adjustment layer mask and use a black brush to hide and white brush to
show. You may see that you need to touch up the face more. Either way, switch
to the correct layer and touch up as needed—zoom in closely!
Now,
you must touch up the layer so you don’t have any “face” peeking out. Again, be
on the adjustment layer mask and use a black brush to hide and white brush to
show. You may see that you need to touch up the face more. Either way, switch
to the correct layer and touch up as needed—zoom in closely!
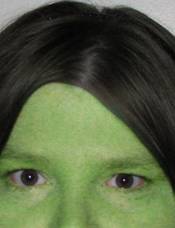
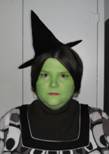
11. There, that’s better!
12. Now, finishing touches on the hat.
13.
The hat layer, if you zoom in, may have some
areas of orange left over from the pumpkin. If so, create a layer mask for the
hat layer. Paint in black on the mask to remove those areas.
14.
Now, click the hat thumbnail and add a slight
drop shadow layer style ![]() :
:

15. Finally, a witch would not wear a pink shirt! Let’s make the shirt grayscale. Click the witch layer and add yet another adjustment layer—Hue/Saturation. Drop Saturation all the way down/left (-100).
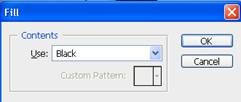
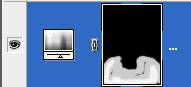
16.
 Oops,
that took over the whole image. Let’s fill that mask with black so the image
rules and then paint on the mask to bring in the desaturated parts. Click the
mask thumbnail press D to reset, and press
Oops,
that took over the whole image. Let’s fill that mask with black so the image
rules and then paint on the mask to bring in the desaturated parts. Click the
mask thumbnail press D to reset, and press ![]() .
Be sure you are set to black.
.
Be sure you are set to black.
17. Okay, now just use a white brush on the mask to paint in the grayscale parts.
18. Do whatever else you see fit…all done!
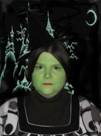
19.
 < SAVE AS: WitchEdited.psd
20. + ON YOUR OWN: Obtain a photograph and use the color retouching techniques! Try the image called dev.jpg and give a hardcore makeover (see my dev-beforeafter.jpg to see what can be done using these recolor techniques and a tattoo brush!)