Flash CS5 Introduction
Workshop—MBEA Summer Conference 2012 Part 1 Key Terms: ·
·
·
Timeline ·
Properties panel ·
Stage (where everything goes; can change size
and background color) ·
Classic workspace ·
fps (frames per second) ·
Layer ·
·
·
·
Break Apart (Control+B to break apart grouped
shapes) ·
·
·
Tools Used: Rectangle Procedure: 1. Identify
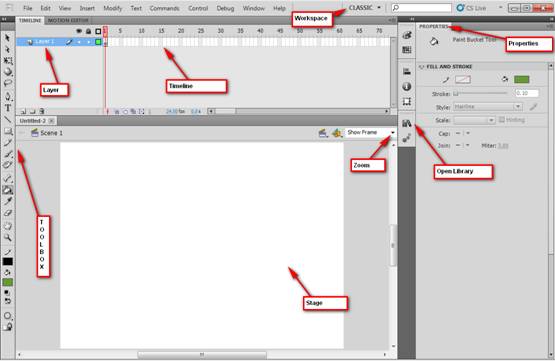
the parts of the screen (Timeline, Layers, Toolbox, Properties panel, Stage,
Zoom) 2. Create
a new Flash Actionscript 3 file. 3. Set
workspace to Classic
(Window>Workspace; reset if needed). 4. On
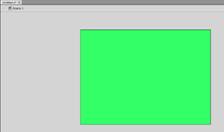
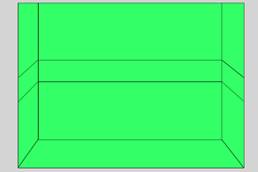
Layer 1, use the Rectangle a.
To make it easier to draw even with the edges,
turn on Snap to Grid (View>
Snapping> Snap to Grid) b.
Be sure to set stroke Properties to Hairline and .10 size c.
NOTE: If using Object Drawing 5. Draw
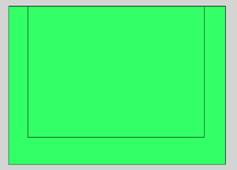
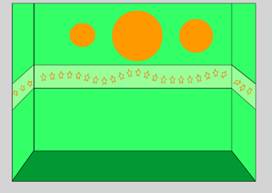
an additional rectangle inside that one to create the back wall: (Same
settings) 6. Use
Line a.
To draw a line straight across the screen,
hold Shift key. 7. Finally,
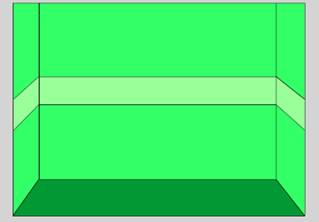
use the Paint Bucket tool to fill
in the carpet color and wallpaper border colors. a.
If you have trouble filling in, be sure to set
Close Large Gaps 8. Save
as greenroom.fla to your project folder. Part 2 Goal: Create grouped shapes
with the Deco Brush, apply transformations, and create a simple symbol. Key Terms: ·
·
·
·
Rename layer (double click) ·
·
Free Transform (Q—allows you to skew, rotate,
or resize groups or selected items) ·
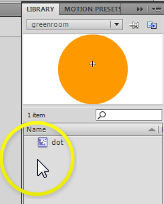
Library (Control+L or F11—holds imported
bitmaps, reusable symbols and other assets) ·
Symbol (special items that are stored in library—can
be graphic, movie clip or button; editable and changes all instances of the
symbol in the movie) ·
Instance (when you drag in a symbol from the Library) ·
Shift (draws perfect circles, squares, or
straight lines) ·
àWarning!
Stacking ungrouped shapes causes shapes to “eat” each other. Procedure: 1. Rename your layer (double-click Layer
1 and call it Room); create a new layer 2. Lock the Room layer. 3.
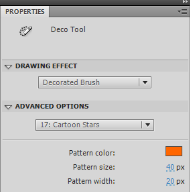
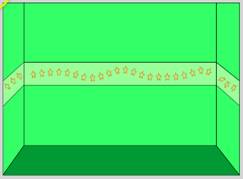
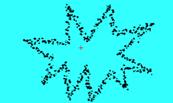
The Deco brush
has some cool features. You can create fire/smoke animations, draw
trees/flowers, draw skyscrapers, and make patterns. These are all
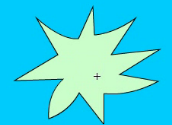
automated! 4. 5. Free
Transform (Q) to get handles to
skew, rotate, or resize your grouped stars. 6. Lock that layer; create a New Layer on top. 7. Create
a New Symbol (Insert> New
Symbol or Control+F8) that is a movie
clip called dot. Note that this will take you “inside” the dot
symbol timeline so you can create your dot.
Rename the layer inside there to be called dot instead of Layer
1. a.
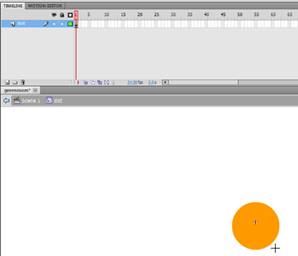
Draw a circle 8. Return to the Scene (Scene 1 or blue
back button). 9. Rename Layer 3 to be called dot.
10. On
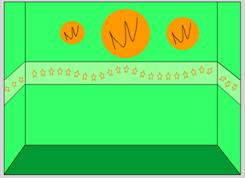
the dot layer, drag in 3 dots from the Library ( 11. Edit the dot Symbol in the Library (double click the picture of
the dot to get in symbol edit mode): a.
Lock
the dot layer; Create a New
Layer inside the dot symbol and use the regular Pencil tool to just scribble something on there. Note that your
pencil might be set to straighten or another mode. If so, you can set it to ink
to be able to better freehand the line. 12. 13. Save your work! Part 3 Goal: Editing symbols, reshaping shapes, apply
shape and motion tweens. Key Terms: ·
Movie Clip (loops continuously; only previews
when testing movie) ·
Tweening (when Flash “fills in” what’s
happening between two keyframes) ·
Shape tween (best to not use stroke unless you
used Object Drawing mode and it’s grouped) ·
Test Movie (Control+Enter; actually publishes
the file to your folder as a swf) ·
Playhead ·
Frame
(F5—rectangle; indicates just “staying on screen”) ·
Motion tween (use only with symbols; change
placement and size or color properties) Procedure: 1. Double-click your biggest circle to
go into symbol editing mode. Notice everything is greyed out except your
circle and the timeline is now the symbol timeline. Inside the dot symbol, rename the
top layer to be ink. 2. (still
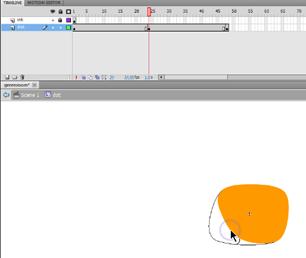
inside symbol) On the dot layer, insert a keyframe at frame 24 and 48 (F6 in each; black dot). Note that
all three dots will be the same size (1, 24, and 48): 3. In
frame 24, make changes to the
circle; reshape using black selection arrow or enhance with paint brush to
make a “bigger” blob shape. You can also change the color if you like. 4. Right click in between the black dots
(between 1 and 24; repeat between 24 and 48) and create Shape Tween. Note that the timeline will turn green to indicate
shape tween. a.
NOTE: You
can still change that middle keyframe and it will all update. Thanks, elves. J 5. Notice
the “ink” disappears after the first frame. To make it “stay on screen”
during the whole animation, click in the final frame of the animation, which
is 48, and on the ink layer, insert
a Frame (F5). Because you inserted a frame and not a keyframe, if you
make a change to the ink at all, it will change it for all the frames. 6. Return
to the Scene 1 screen where the
main timeline (the room) is. 7. Save!
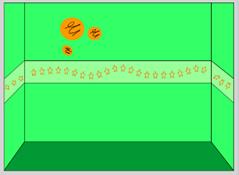
Preview the movie to see the tweens. Press Control+Enter. Exit the test movie popup after viewing. 8. Reposition 9. Lock all layers on the main timeline
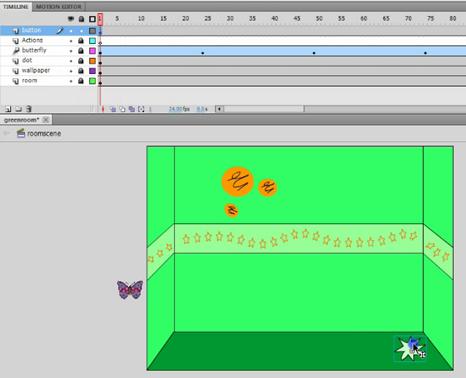
(dot, wallpaper, and room). Create a
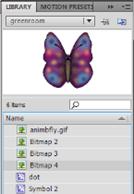
new layer called butterfly. 10. Import the graphic
animation—animbfly.gif—to the Library
(File>Import> Import to Library and
browse to find the image). Note that this will create several items in the
Library. Open it to see: 11. Drag
the bfly movie clip from the Library
to the first frame of the butterfly layer on the main Timeline. We will animate this
butterfly to fly across the screen in a minute, so position her just off
Stage at the left. And, size her down a bit (use Free Transform/Q). 12. We
want this animation to last about 4 seconds or so (100 frames). So, add a Frame (F5) to the 100th frame of all the
previous items (dot, wallpaper, and room layers) to that they “stay put” on
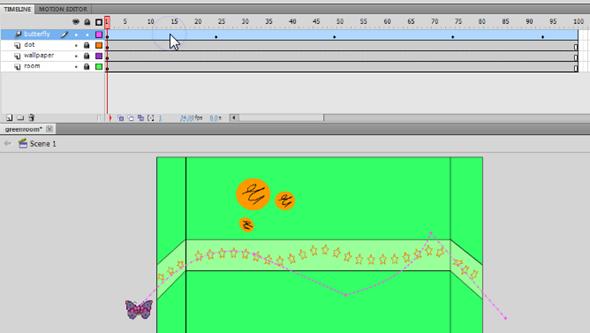
the screen: 13. On
the butterfly layer, create a Motion
Tween (right click the black dot, Create
Motion Tween). Drag the blue
box edge on the Timeline to the 100th frame. 14. Drag
the playhead (red line) about a second in (24 frames or so) and reposition
the butterfly (click and drag her; you can also rotate her, if desired).
Repeat this process three more times in different spots with the butterfly
off the screen towards the end: 15. To
edit any of the straight lines to curves, using the Selection arrow point to the line (don’t click on them) and click
and drag when you see a curve appear: 16. Drag
the playhead and you should see the butterfly fly across; however, the movie
clip does not play (she actually flaps her wings!) until you test the movie.
So, save and test it! Control+Enter! 17. Notice
that the movie plays and then repeats because that’s what Flash does. The
butterfly will fly across and then the process will repeat (the movie
replays). The shape tweens on the wall will continue to pulse. Exit the
preview and save your work. Part 4 Goal: Create and change scenes, add Actionscript
using Code Snippets (stop and button), and create a button symbol. Key Terms: ·
Scene (plays to next scene automatically
before looping; Window>Other Panels> Scene) ·
Actions (F9) ·
Button (States: Up, Over, Down, Hit) ·
·
Stroke styles (hairline, ragged, hatch,
dashed, etc.) ·
Actionscript ·
Code Snippets Procedure: 1. Bring
up the Scenes panel
(Window>Other Panels> Scene) to add a second scene. Press the white
piece of paper button 2. Click
on the guy scene to work on it. Notice it is blank and white. Use the Selection tool and click the
background. In the Properties
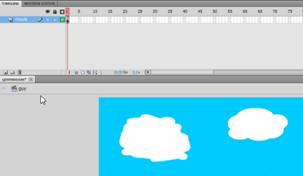
panel, set the Stage background color to a sky blue. 3. Now,
rename the layer clouds. Draw two clouds—one using the paintbrush
(notice you can change size and shape of brush at the bottom of the toolbox;
fill with paint bucket) and one using overlapping circles with no
stroke. Notice that if Object Drawing
is turned off, the circles combine to make one moveable cloud: 4. Save and Test movie (Control+Enter)
and you should very briefly see your clouds pop in after the first scene
ends. 5. Return
to the first scene (roomscene). We
are going to be creating a button to take us to the second scene, so we need
to make the first scene stop. To do this, you must add Actionscript. This is
done in the Actions panel (F9). We
can use special Flash shortcuts called Code
Snippets to do this easily. a.
Click
at the ending frame, where we want it to stop (frame 100) on the top
layer b.
Bring up the Actions panel (F9) c.
Click the Code
Snippets button d.
A panel appears; find Timeline Navigation and double
click on Stop at this Frame. This inserts a Stop action
into the Actions panel (and a
comment above it explaining codes) e.
Close
the Actions panel and Code Snippets panel and Test Movie to be sure it stops. Note that movie clips do not stop
and play even when the Timeline is stopped. 6. Notice
a little “a” on the timeline on a new layer that Flash created called Actions.
7. Lock all layers. Create a new layer
on the main Timeline in the roomscene.
Name it button. 8. Create
a new symbol (Insert> New Symbol)
called nextbutton. It should be a button type. 9. 10. Fill
(Paint Bucket) in the shape with a color. Be sure Close Large Gaps is set. a.
If you wanted to add text, be sure to do that on
a separate layer. 11. Rename the layer star (inside
the button). Insert a keyframe
(F6) on the Over state. Click off
of it with the Selection arrow and
change the inside fill color. 12. Repeat
the process again, changing the fill color in the Down state (Insert Keyframe first!). a.
NOTE: The Up state is when the button
is just sitting there; the Over state is when the mouse is pointing to
it; the Down state is when the button is being clicked. Those are
important to understand. You can just make a button with only the Up state,
however. That’s all that is required. The Hit state is a whole separate
thing. Basically, it means that it defines the area that ‘can’ be clicked to
activate the button. This really only matters if you have a button that isn’t
on a shape as clicking letters would otherwise have to be precise. b.
BONUS: You could change the star points on the
states, add clipart, change words, etc. 13. Return
to the Stage on the roomscene.
Drag the button from the Library
to the button layer (be sure the rest are locked!). Position
in the bottom right corner. Transform/resize
as needed (Q). 14. Save and Test Movie (Control+Enter). If you click the button, nothing
happens. Sadly. We have to “script” that. But, the color changes should happen (Up,
Over, Down). Check that out and return to the timeline. 15. Before
we script the button, we need to give it an Instance name. It is needed for scripting. Click the button once
with the Selection arrow and fill
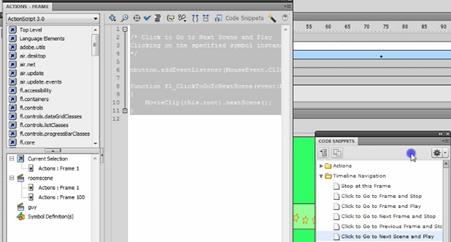
in the Instance name in the Properties panel: 16. While
the button is active and the Timeline
is in frame 1, bring up the Actions
panel (F9) and click Code Snippets. To script a button, go to Timeline Navigation and find the one
that says Click to Go to Next Scene
and Play. Double click that and it should insert your code. 17. Close
those panels. Then, we can extend the second scene so we can test this to
make sure it works. Switch to the guy scene (Scenes panel) and insert a Frame
(F5) at 100. This will make the clouds stay on the screen for about 4 seconds
so we can actually make sure the button is working. 18. Go
back to the roomscene. Notice that you have two Actionscript frames
(with little a’s). 19. Now,
Save and Test Movie (Control+Enter) and the button should work, the clouds
should sit there for 4 seconds, and then the movie should return to the first
scene and replay! 20. If
all works, smile and save! Bonus Funà
You can modify the stroke (like on the button or whatever) in the Properties
panel. It can be solid, dashed, dotted, and lots of other fun things! Part 5 Goal: Create drawing from
combined shapes, use Pen tool to create custom shape, and convert drawing to
symbol. Key Terms: ·
Switching between scenes ·
Drawing/modifying shapes and lines ·
Overlapping shapes and removing strokes ·
·
Convert to Symbol (F8—select item first) Procedure: 1. Bring
up the Scenes panel
(Window>Other Panels> Scene) and be sure you are in the guy
scene. 2. Lock the clouds layer. Create
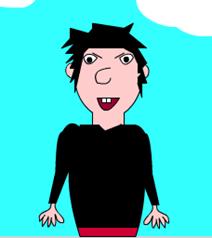
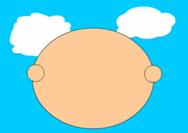
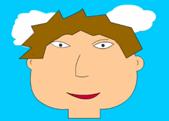
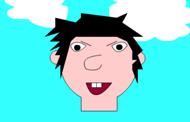
a new layer called guyhead. 3. Click
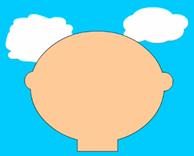
on the guyhead layer. Choose the Oval
tool and use a hairline black stroke and choose a skin color.
Draw overlapping circles as shown
to create a head with ears: (draw big and we’ll size down later! Note that if
Snapping is bugging you, you can disable it under View> Snapping) 4. Use
the Selection arrow to pick the
lines you need to delete and press Delete
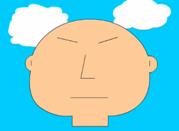
to remove them: 5. Use
the Line tool to draw in eyebrows,
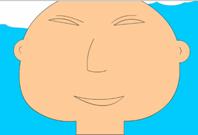
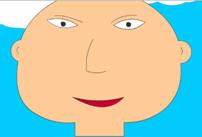
a nose, and a mouth line. You may also draw ear cracks. J 6. Use
the black Selection arrow to point
to and curve the lines. It is helpful to zoom
up close to do this. Add additional lines to create a mouth and eyes (make
half the eye, curve, make second half) and fill (Paint Bucket) in the eyes and mouth with color. Use the Brush tool to add pupils. 7. Lock the guyhead layer; Create
a new layer and call it hair.
Then, use the Pen 8. Now,
be sure the guyhead and hair layer are unlocked (clouds should
be locked). Use the Selection
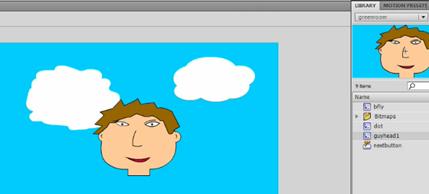
arrow to draw a box around those to select them. Convert this to a movie
clip symbol (F8) called guyhead1. Size down (Q) and reposition so you can draw the trunk. 9. Create
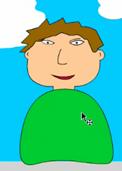
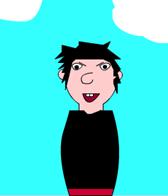
a new layer called torso. Lock all the other layers. Use an Oval (or other shapes) to draw the
torso and adjust with Selection
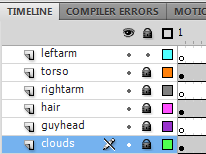
arrow. 10. Lock the torso. Create two new
layers—leftarm and rightarm.
Leftarm should be the topmost layer, then torso, then
move rightarm below torso. Lock
all layers except leftarm. Use the Pen tool to create the arm; fill
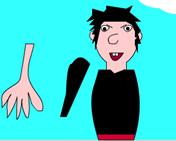
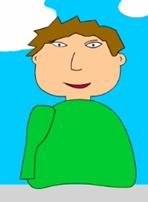
with the same color as the shirt. Modify with Selection arrow. 11. 12. Move the hand in place where it goes.
Then, select the arm
(double-click), move it where it goes (do not deselect!), cut it (Control+X) and paste it in place (Edit>Paste in Place) and it should
be in position in front of the hand where it goes. They will “glue” together
so be careful. Pasting it should put the arm in front of the hand. 13. Now,
click off the leftarm layer for a second (click another layer) and
click back on the leftarm layer (this selects everything on the layer, arm + hand). Right click and copy the arm. 14. Lock the leftarm layer and unlock the rightarm layer.
Click on the rightarm layer and paste
the arm. It will be behind the body since that layer is behind the torso
layer. Use the Selection arrow to
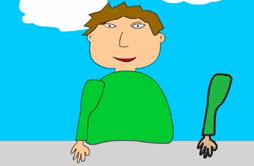
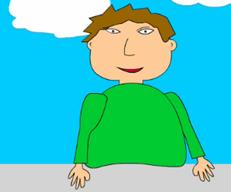
move it off to the right for a moment. 15. To
flip the arm around, just click Modify> Transform> Flip Horizontal.
This “mirror” flips it. Then, position it where it should go. Feel free to Free Transform as needed (Q). 16. Save! Lesson 6 Key Terms: ·
·
Armature Layer (created by Bone tool; edit
armature with Selection arrow) Procedure: 1. Lock all layers before we go on…just
to be safe. J 2. Unlock
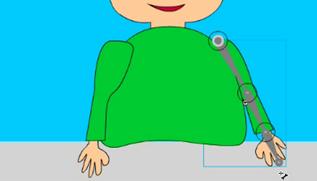
rightarm layer and select the right arm with the Selection arrow (draw a box around the hand and sleeve). Click
the 3. Click
at the shoulder and drag to the elbow; click elbow to the wrist; and then
click wrist to the top of the fingers. It will group them and appear as
follows: 4. Notice
that it has created a new layer
called Armature and has moved the arm from the rightarm layer to that Armature
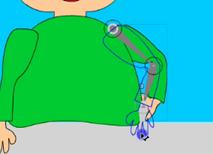
layer. It is also a “tween” looking layer (shaded green). 5. Just
like with a Motion Tween, you will move the Playhead a few frames, position
the arm by dragging the bones, move the playhead again, reposition, etc. It
will tween between positions automatically. For the right arm, just wiggle it
around a little bit. Nothing dramatic. 6. Lock this arm and unlock the other arm. Then, repeat
the process. Select the left arm,
use the Bone tool, drag the joints, and then begin
animation with the Selection tool
while scrubbing the Timeline (remember,
it will create an Armature layer for animating). The left arm should
lift up and wave back and forth a few times. Then, he should put his arm back
down. Use your imagination. J 7. Drag
the playhead to the beginning
(Frame 1) and press Enter to
preview the Timeline animation. If it looks okay, save it! Sometimes if the
Armature is too complicated or the arm overlaps itself, odd white spaces will
occur. So, try to avoid that and, if you see it in preview, try to
reposition. 8. Test movie (Control+Enter) and see if
everything works. 9. NOTE: Remember, you can still edit
the head (it’s a symbol) in the Library
if you decide to change the expression or other features. You can also unlock the torso layer and
edit that (draw lines and make stripes, etc.). Make it yours!
Bonus Material—Motion Path
(previously motion guide) Key Terms: ·
Motion guide ·
Orient to path Procedure: 1. In
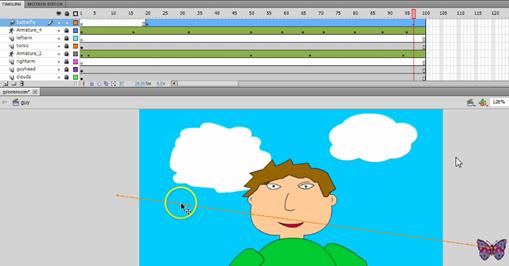
the guy scene, create a new
layer called butterfly. Lock
all other layers. 2. We
want the butterfly to wait to fly in and not to appear until frame 20. So,
insert a Blank Keyframe (right
click) at frame 20 on that layer. A hollow dot should appear. 3. Drag
the bfly movie clip from the Library
onto the Stage while clicked on frame 20 of the butterfly layer.
Position off stage left. Size down as needed (Q). 4. Grab
the Pencil tool. Draw a path from
the butterfly across the scene and off the Stage. 5. After
drawing the path, take the Selection
arrow and double-click the path to
select it. Then, cut it
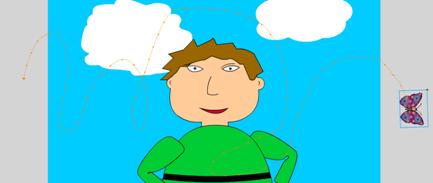
(Control+X). We will paste it in a little bit. 6. Now,
right click the actual butterfly
and Create Motion Tween. Then,
scrub the Playhead to near the end of the tween (97 or so) and reposition the
butterfly to off stage right. 7. Now,
click the colored/dotted motion
tween line with the Selection
arrow. Then, click Edit> Paste in
Place or Control+V and your path you drew earlier should replace the
straight line! You may be prompted to Optimize the Path (that’s okay).
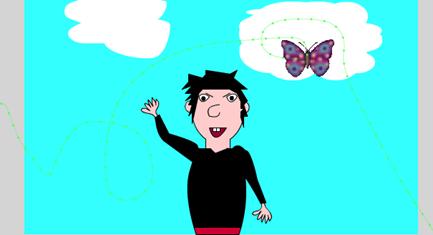
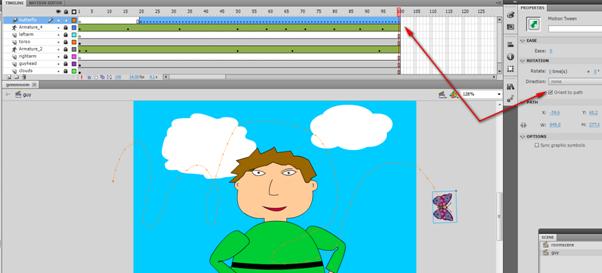
8. To
make the butterfly “turn” towards the path as it goes, you can click anywhere
in the blue motion tween area on the Timeline and check Orient to Path on the Properties panel: 9. That
should do it. Save it and test it! J Resource for GIF animation used
in the project: http://www.millan.net/anims/giffar.html
(bfly animation) Workshop Website (can
download the GIF and link to the screencasts or view example): https://sites.google.com/site/deseworkshops2012skinner/
(click Flash Workshop at left) Tutorial Site (my
screencast of this workshop, step by step on-screen demo): http://www.screencast-o-matic.com/channels/cXi0fOVuS
|






















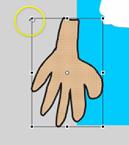
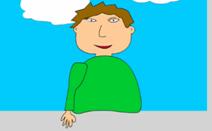 Off to the side, draw a big hand using
the Pencil tool.