Photoshop Lesson 2: Using Selection Tools
- Explain the terms perspective, layout, and storyboard
- Describe selection tools
- Open a file, select objects in a photo, and save a file
- Use the marquee tools
- Move a selection
- Make transformation edits
- View states in the History palette
- Employ the lasso tools
- Add and subtract from selections
- Create ruler guides
- Select objects using the Quick Selection and the Magic Wand tools
- Create new keyboard shortcuts
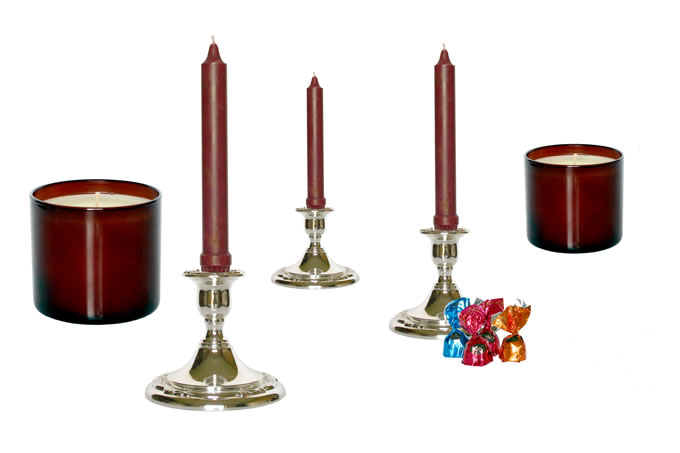
| Original Photo |
Edited Photo |
 |
 |
Open/Save
- Open Photoshop
- To open the candle image do the following:
- File
- Open
- Look in Macserver
- Groups
- Students
- Photoshop CS3
- Lesson 2
- Candles
- To Save As do the following:
- File
- Save As
- Documents (Your Documents)
- Photoshop
- Lesson 2
- Name - Candles_Edited
- DO NOT CHANGE THE FILE TYPE! (.psd)
Using the Rectangular Marquee Tool
- Right-click the Rectangular Marquee Tool button the Tools palette and then click Rectangular Marquee Tool. If necessary, on the options bar, click the New selection button.
- In the photo, use the mouse to draw a rectangle as close as possible around the short candle.
To Use the Move Tool
- With the short candle still selected, click the Move Tool button on the Tools palette. If necessary, on the options bar, click the Auto-Select check box so it does not display a check mark. If necessary, click the Show Transform Controls check box so it does not display its check mark.
- Drag the candle to a position left of the tall candle and slightly higher. Do not allow the moved selection to overlap any portion of the tall candle.
- With the short candle still selected, press and hold the ALT key and then drag the selection to a location above the candy.
To Scale a Selection
- With the Move Tool button still selected, click the Show Transform Controls check box on the options bar. Keyboard shortcut to transform is Command T.
- Point to the upper-left sizing handle of the selection border.
Assignments:
- PS_Ch2_In_the_Lab_1 Assignment for 9-4-15 continue with Lab 2 if finish Lab 1
- PS_Ch2_In_the_Lab_2 Assignment for 9-4-15


